Have you faced the “CUDA setup failed despite GPU being available” error when running your machine learning or deep learning project? You’re not alone! Many encounter this issue with GPU tasks in PyTorch or TensorFlow.
“CUDA setup failed despite GPU being available” means your system can’t use the GPU for tasks. This can happen due to driver issues, incorrect settings, or compatibility problems. Checking installations and environment variables usually helps resolve this error.
Don’t worry; this guide will help you understand “CUDA setup failed despite GPU available, why this error happens and how to fix this error!
What Is CUDA?
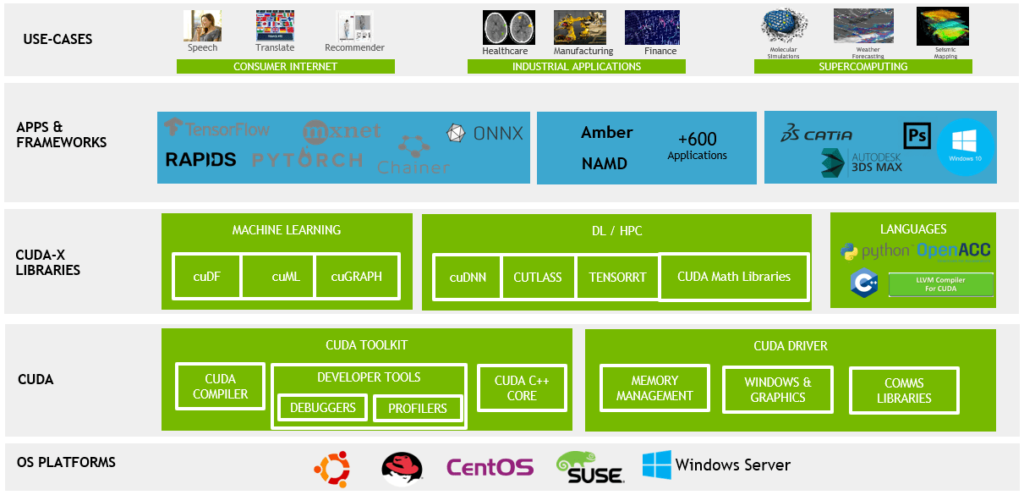
CUDA (Compute Unified Device Architecture) is a technology developed by NVIDIA that allows your computer’s GPU (graphics card) to handle complex tasks, making things run faster. It lets programmers use the GPU’s power for jobs like deep learning, scientific calculations, and video editing, instead of just using it for graphics. This makes the computer work much quicker for heavy tasks.
What Is The Error “CUDA Setup Failed Despite GPU Being Available”?
The error “CUDA Setup Failed Despite GPU Being Available” happens when your computer has an NVIDIA GPU, but the CUDA software can’t connect or work with it. This issue often occurs due to incorrect drivers, version mismatches, or missing CUDA installations, which prevent the GPU from being used properly for tasks like deep learning.
Also Read: Red Light On GPU When Pc Is Off – Don't Panic, Check This Now!Why Does this error happen “ CUDA Setup Fail Despite the GPU Being Available”?
1. CUDA Version Mismatch:
The error can happen if the CUDA version you installed doesn’t match the version supported by your software or GPU. For example, if you have a newer GPU but an older CUDA version, they might not work well together. Always make sure the CUDA version is compatible with your GPU and software.
2. Outdated Or Incorrect GPU Drivers:
If your GPU drivers are outdated or improperly installed, CUDA might struggle to recognize your GPU correctly. To fix this, download and install the latest drivers from the NVIDIA website.
3. Insufficient GPU Memory:
If your GPU doesn’t have enough memory for your task, you might see this error. For example, if you try to run a large deep learning model, your GPU might run out of memory. You can address this by utilizing a smaller model or by clearing up GPU memory.
4. PyTorch or TensorFlow Installation Issues:
Sometimes, this error occurs if PyTorch or TensorFlow isn’t installed correctly or doesn’t match the CUDA version. These frameworks rely on CUDA to use the GPU, so mismatched or broken installations can cause problems. Reinstalling them can often fix the error.
5. Virtual Environment Issues:
If you’re using a virtual environment like Conda or venv, CUDA might not work if it’s not set up correctly inside that environment. Make sure your virtual environment has access to the right CUDA paths and libraries to avoid this error.
6. Hardware or BIOS Issues:
Sometimes, the error happens because of hardware or BIOS settings. Your computer’s BIOS might have disabled the GPU, or there could be a hardware problem with the GPU itself. Verify your BIOS settings to confirm that the GPU is activated, and double-check that the GPU is securely connected.
How To Check If Your GPU And CUDA Are Working Properly?
1. Check Your GPU Compatibility:
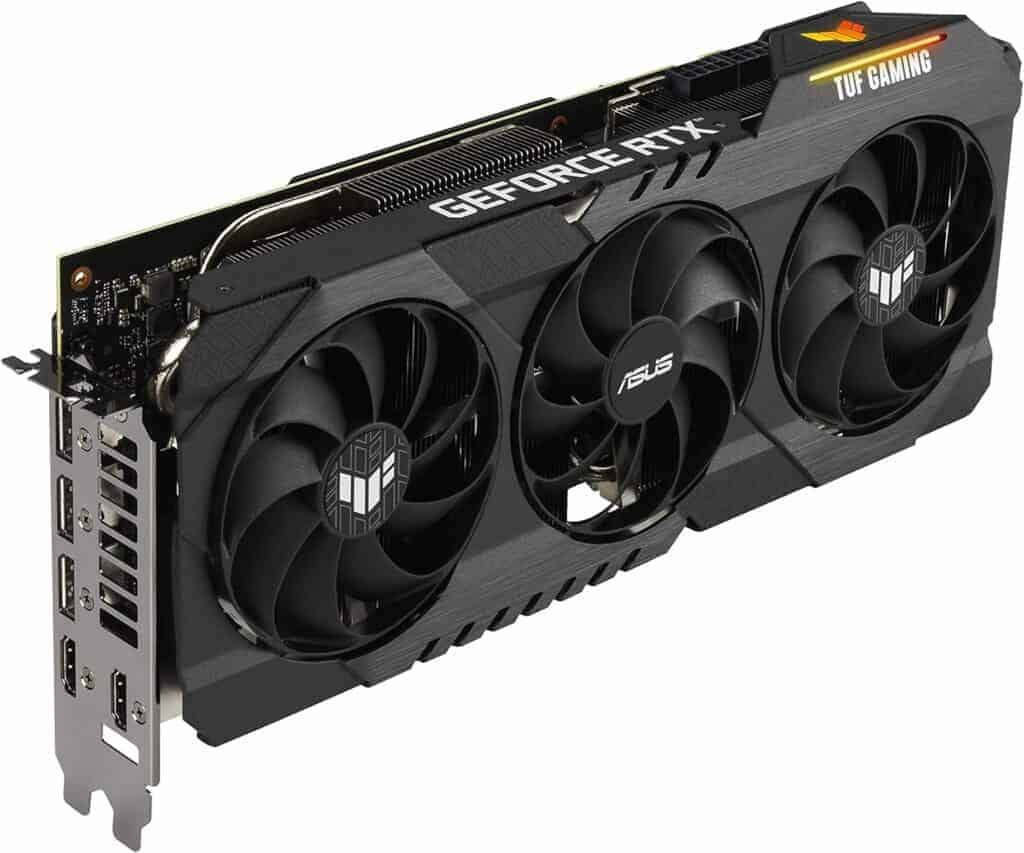
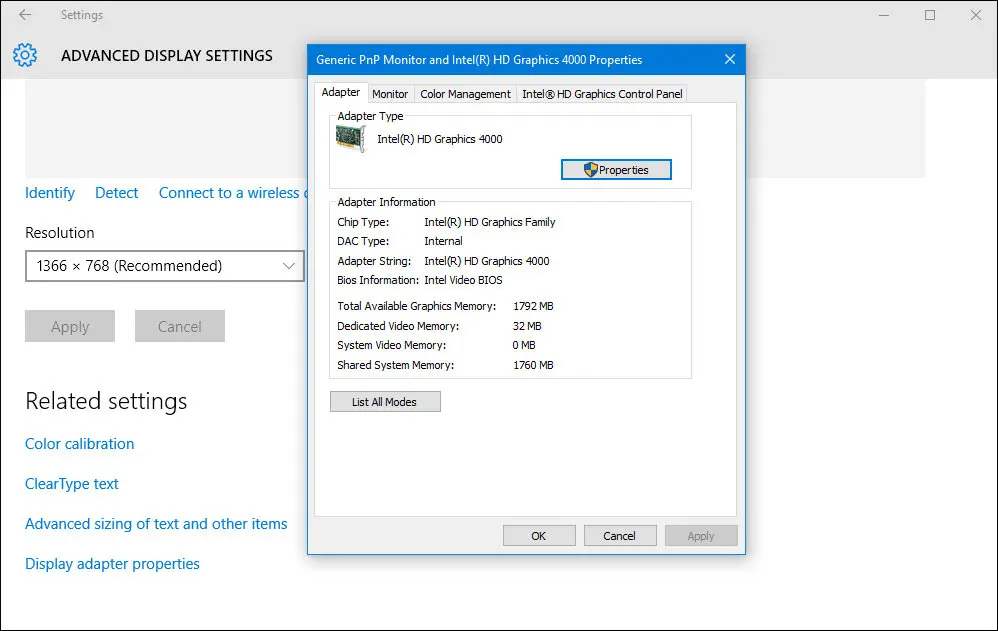
First, make sure your GPU is from NVIDIA, as only NVIDIA GPUs work with CUDA. You can check your GPU model by opening “Device Manager” on Windows or using the lspci | grep -i nvidia command on Linux. Then, visit the NVIDIA CUDA GPUs page to see if your GPU model is listed as compatible.
2. Verify CUDA Installation:
Check if CUDA is correctly installed on your computer. On Windows, open the command prompt and type nvcc –version, and on Linux, use nvcc –version in the terminal. If CUDA is installed properly, you’ll see the version details. If it doesn’t show anything, you might need to reinstall CUDA.
3. Test with Python:
To check if CUDA is working with your deep learning software, use a simple Python test. Open a Python environment and run this code:
import torch
print(torch.cuda.is_available())
If it prints True, it means CUDA is working properly with your GPU. If it shows False, there might be an issue with the installation or setup.
How To Fix “CUDA Setup Failed Despite GPU Being Available”?
1. Check NVIDIA Driver Installation:
Make sure you have the latest NVIDIA drivers installed for your GPU. Visit the NVIDIA Driver Download page and enter your GPU model to get the latest version. Outdated or missing drivers can prevent CUDA from working correctly.
2. Verify CUDA Toolkit Installation:
Ensure that the CUDA Toolkit is installed on your computer. You can download it from the NVIDIA CUDA Toolkit website. After installing, verify it by running the command nvcc –version in the terminal or command prompt. This will show the installed CUDA version.
3. Set Environment Variables:
Your system needs to know where CUDA is installed. Add CUDA paths to your environment variables:
1. On Windows, go to “System Properties” → “Environment Variables,” then add C:\Program Files\NVIDIA GPU Computing Toolkit\CUDA\vX.X\bin to the “Path” variable.
2. On Linux, edit your .bashrc file with:
export PATH=/usr/local/cuda-X.X/bin${PATH:+:${PATH}}
export LD_LIBRARY_PATH=/usr/local/cuda-X.X/lib64${LD_LIBRARY_PATH:+:${LD_LIBRARY_PATH}}
Replace X.X with your CUDA version.
4. After Editing, Reload the File with:
If you’re on Linux, reload the .bashrc file to apply changes:
source ~/.bashrcThis step ensures the system recognizes the new CUDA settings.
5. Check GPU Memory:
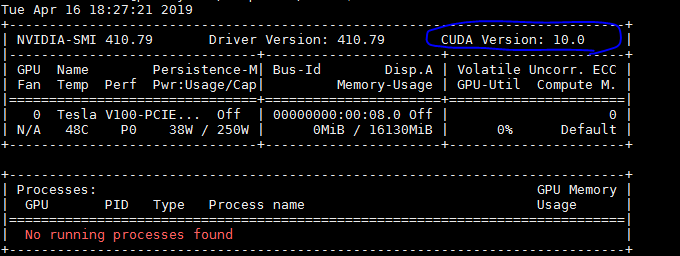
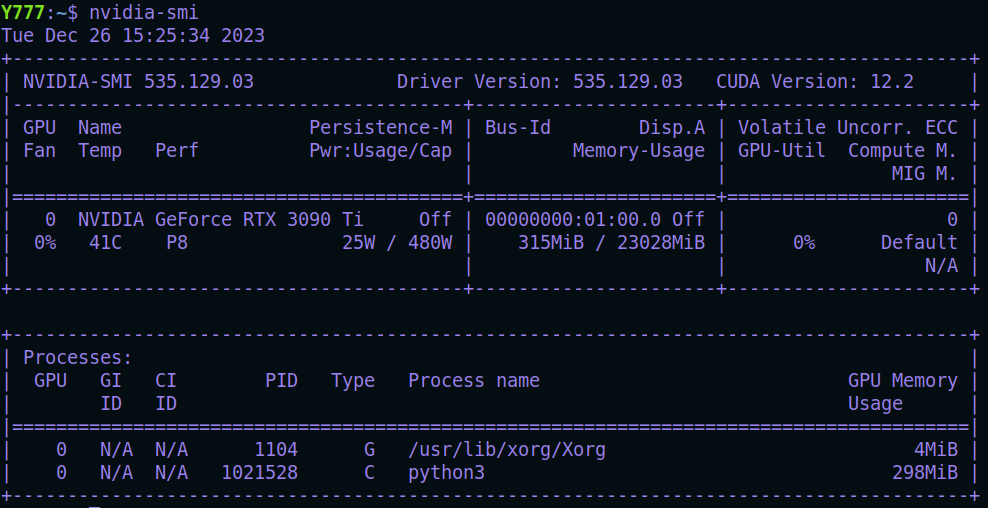
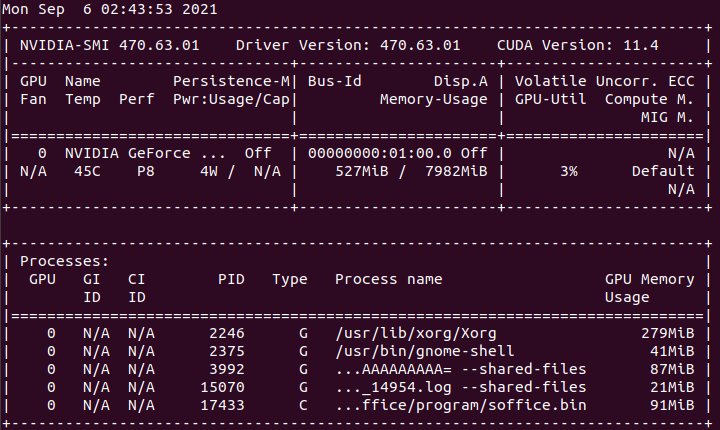
Ensure your GPU has enough memory for CUDA tasks. Run nvidia-smi in the terminal or command prompt to check your GPU’s memory usage. If it’s almost full, try closing other programs that might be using the GPU.
6. Verify GPU Compatibility:
Confirm that your GPU supports the installed CUDA version. You can find the list of compatible GPUs on the CUDA GPUs page. Using an unsupported GPU might cause the error.
Also Read: Can You Use AMD GPU With Intel CPU – Complete Guide 2024!7. Fix Permission Issues:
On Linux, sometimes CUDA can’t access the GPU due to permission issues. You can run your code with elevated permissions using `sudo`, or alternatively, add your user to the “video” group with the following command:
sudo usermod -aG video $USERThis grants proper access to your GPU.
8. Manage Multiple CUDA Versions:
If you have multiple CUDA versions installed, ensure your environment variables point to the version you want to use. You can change the active version by adjusting the paths in your environment settings (e.g., .bashrc file).
9. Handle TensorFlow/PyTorch Issues:
For TensorFlow or PyTorch, ensure you’re using their GPU versions by installing them with:
pip install tensorflow-gpu
pip install torch torchvision torchaudio
Always check their documentation to confirm that your installed versions are compatible with CUDA and cuDNN, as mismatched versions can lead to errors.
10. Reinstall CUDA and Drivers:
If issues persist, consider reinstalling CUDA and NVIDIA drivers to fix any potential errors. Use these commands:
sudo apt-get purge nvidia*
sudo apt-get autoremove
sudo apt-get install nvidia-driver-460
wget https://developer.download.nvidia.com/compute/cuda/11.4.2/local_installers/cuda_11.4.2_470.57.02_linux.run
sudo sh cuda_11.4.2_470.57.02_linux.run
Make sure to follow the installation instructions closely to ensure everything is properly set up and compatible.
How Do I Check My CUDA Version?
To check your CUDA version, open the Command Prompt (Windows) or Terminal (Linux/Mac) and type nvcc –version. This command shows the installed CUDA version. Alternatively, you can look for the CUDA folder on your computer under C:\Program Files\NVIDIA GPU Computing Toolkit\CUDA (Windows), where the version number is part of the folder name.
How Do I Know If My GPU Supports CUDA?
To check if your GPU supports CUDA, you can visit the NVIDIA CUDA GPUs page and look for your GPU model. Any NVIDIA GPU with a Compute Capability of 3.0 or higher supports CUDA. You can also run the nvidia-smi command in your terminal or command prompt, which will show if your GPU is CUDA-capable.
Why Is CUDA Not Working?
CUDA might not work due to a few reasons, such as version mismatches between CUDA and your GPU drivers, outdated or incorrectly installed drivers, or insufficient GPU memory. Sometimes, the software (like TensorFlow or PyTorch) might not be compatible with your CUDA version. Ensuring that all versions match and are properly installed can help fix the issue.
How Do I Enable CUDA On My GPU?
To enable CUDA on your GPU, first, install the latest NVIDIA drivers from the NVIDIA website. Next, download and install the CUDA Toolkit, which comes with the necessary libraries and tools for CUDA development. After installation, make sure to set the correct environment variables in your system settings, so your software can find CUDA. Lastly, restart your computer to ensure the changes take effect.
How Do You Verify You Have A CUDA-Capable GPU?
To check if your GPU is CUDA-capable:
- Visit the NVIDIA CUDA GPUs page: Find your GPU model on the list of supported GPUs. Any GPU with a Compute Capability of 3.0 or higher supports CUDA.
- Use the command line: Run nvidia-smi in your terminal (Linux) or command prompt (Windows). This will display information about your GPU, including whether it supports CUDA.
How To Check If CUDA Is Installed In Windows?
To check if CUDA is installed on your Windows system:
- Use Command Prompt: Open the Command Prompt and enter the command `nvcc –version`. This will display the installed CUDA version if it’s correctly set up.
- Check the installation folder: Navigate to C:\Program Files\NVIDIA GPU Computing Toolkit\CUDA to see if CUDA is installed and to find the version number.
CUDA Setup Failed Despite GPU Being Available on Ubuntu
If you encounter this error on Ubuntu, it could be due to:
- Driver issues: Make sure your NVIDIA drivers are correctly installed and updated.
- Incorrect CUDA installation: Reinstall CUDA and ensure the version matches your GPU’s capability.
- Path issues: Check that the CUDA paths are correctly set in your .bashrc file. Add:
export PATH=/usr/local/cuda/bin:$PATH
export LD_LIBRARY_PATH=/usr/local/cuda/lib64:$LD_LIBRARY_PATH- Conflicting software: Ensure no conflicting software or older versions of CUDA are causing issues.
Can I Have Multiple CUDA Versions Installed on My Computer?
Yes, it’s possible to have multiple versions of CUDA installed on your computer. However, to avoid conflicts:
- Set the correct environment variables to point to the version you want to use.
- Use tools like module load cuda/XX.X (on some systems) to switch between different versions.
- Ensure your applications are compatible with the selected CUDA version.
Also Read: Runtimeerror: No GPU Found. A GPU Is Needed For Quantization. – Here’s How to Fix It!What Should I Do If I Have Multiple Cuda Versions Installed?
1. Set Environment Variables:
You need to adjust your environment variables to point to the desired CUDA version:
- Open your terminal and edit the .bashrc or .bash_profile file:
nano ~/.bashrc- Add the following lines to set the CUDA path (replace X.Y with your desired CUDA version number, like 11.2):
export PATH=/usr/local/cuda-X.Y/bin:$PATH
export LD_LIBRARY_PATH=/usr/local/cuda-X.Y/lib64:$LD_LIBRARY_PATH- Save and close the file. Then, reload the environment variables with:
source ~/.bashrc2. Verify the CUDA Version:
After setting the environment variables, check that the correct CUDA version is active by running:
nvcc --version3. Use Module System (Advanced):
On some systems, you can use a module system to easily switch between different CUDA versions. Use the command:
module load cuda/X.YThis command will activate the designated version of CUDA.
4. Check Compatibility:
Ensure that the software or frameworks you are using (like TensorFlow or PyTorch) are compatible with the CUDA version you set. Refer to their documentation for specific CUDA and cuDNN version requirements.
5. Uninstall Unused Versions (Optional):
If certain versions are no longer needed, consider uninstalling them to avoid confusion. Use the package manager to remove any unwanted versions while ensuring that your desired version remains.
Why Is My CUDA Not Recognizing The GPU After Installation?
CUDA might not recognize your GPU if the NVIDIA drivers are outdated, incorrectly installed, or incompatible with your GPU. Ensure you have the latest drivers installed, and verify that your environment variables are set correctly for CUDA to detect your GPU.
Why Does My System Crash When Running CUDA Applications?
System crashes during CUDA applications often happen due to driver issues, overheating, or insufficient power supply. Check that your GPU drivers are updated, monitor your GPU temperature, and ensure your power supply unit (PSU) is capable of handling your GPU’s power needs.
What Should I Do If I Get A “CUDA Out Of Memory” Error?
A “CUDA Out of Memory” error occurs when your GPU doesn’t have enough memory for the task. Try reducing the batch size, using a smaller model, or clearing other GPU processes running simultaneously to free up memory.
Also Read: GPU Only Works In Second Slot – Isolate The Problem!FAQs:
1. Can I Run CUDA Programs Without Installing The CUDA Toolkit?
You must install the CUDA Toolkit to execute CUDA programs. It provides the necessary libraries and tools for your GPU to work with CUDA.
2. Why Does My CUDA Program Work On One PC But Not On Another?
This might happen because the second PC doesn’t have the same CUDA version, drivers, or a compatible GPU. Ensure both PCs have matching versions and hardware.
3. How Do I Reset My GPU If CUDA Stops Working?
You can reset your GPU by restarting your computer. On Linux, you can also use the command sudo nvidia-smi –gpu-reset to reset the GPU without rebooting.
4. Can CUDA Be Used For Gaming?
CUDA is mainly for accelerating computing tasks, not gaming. However, some game developers use CUDA to enhance certain graphics features.
5. How Can I Test If CUDA Is Running Correctly After Fixing The Error?
You can test CUDA by running simple code in Python:
import torch
print(torch.cuda.is_available())
If it prints True, CUDA is running correctly.
6. Does Updating My Operating System Affect CUDA?
Yes, updating your operating system might affect CUDA. Sometimes, OS updates can make drivers incompatible, so you may need to reinstall CUDA or GPU drivers.
7. Can Using An External GPU Cause CUDA Errors?
Yes, using an external GPU can cause CUDA errors if it’s not properly connected, configured, or doesn’t have the correct drivers installed..
8. Is There An Alternative To CUDA For Non-NVIDIA GPUs?
Yes, you can use OpenCL as an alternative. OpenCL works with GPUs from other brands like AMD, but it’s not as optimized as CUDA for NVIDIA GPUs.
Final Thoughts:
In conclusion, the error “CUDA setup failed despite GPU being available” can be frustrating, but you can resolve it by ensuring your GPU drivers, CUDA versions, and deep learning frameworks are compatible. Check your installations and configurations to troubleshoot effectively. If you still encounter issues, consider seeking help on forums or communities focused on CUDA and deep learning, where users share experiences and solutions.
Related Posts:
- Is BeamNG CPU Or GPU Intensive – Boost Your Setup In 2024!
- Runtimeerror: No GPU Found. A GPU Is Needed For Quantization. – Here’s How to Fix It!
- Red Light On GPU When Pc Is Off – Don’t Panic, Check This Now

